
I've been a fan of Android and other tech for a long time now. But when it comes to my Android phone, I enjoy goofing with it and seeing what can be done with it from a hacker/hobbyist perspective. Sometimes my geeky, nerdy and dorky traits serve me well. I'm able to dabble with things and sometimes fix them. On the other hand, those same traits can also get me in trouble with my tech.
As mentioned in a previous post, I wanted to hack another OS onto my beloved tablet. This went well until my device became partially bricked and UNUSUABLE. Typically I use toolkits that simplify these processes for even the least techy person on the planet.
Nothing against the toolkit this time, but it didn't work for me and because I couldn't see what the toolkit was doing behind the scenes, I had a hard time troubleshooting my issue. Therefore research was done and my nerdy hat was put on.
My research showed that I needed to get to the root of everything by connecting my tablet to my Linux pc and run some good ol' command prompt. It was interesting to me. It was fun. It was beautiful. Let me give ya the run down of what I had to do to nurse my Nexus 7 back to life manually. It's actually very easy with a Linux pc.
***i take no responsibility for you breaking your device .these steps work for me. ****
First, I downloaded a bootloader and Nexus 7 disk image to be used. Then plugged it into the computer and made sure it was recognized by my computer. This is done with the command "adb devices."
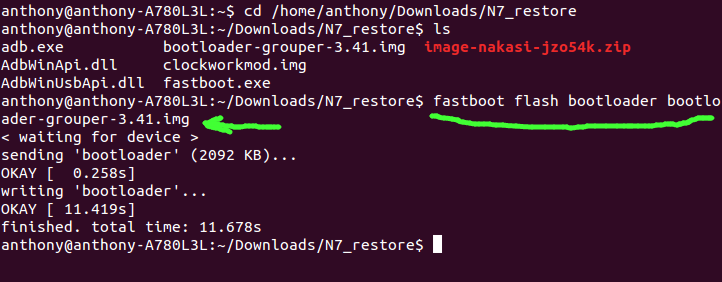
After that's done, I placed the package contents into a folder and had the command prompt look there. In this case, the folder path is /home/anthony/Download/N7_restore. Just use the "cd" command.
Next, I wanted to list what was in the folder for my reference. Just use "ls" .
Note: some extra files are in there from other experimenting, but they can be ignored.

Now we can begin the fun of pushing the bootloader to the device and the operating system. This is done with the "fastboot" command: "fastboot flash bootloader <file name>"
After each file is pushed, I found that rebooting the bootloader made things stable and allowed the next step to work. It's as easy as "fastboot reboot-bootloader".
Now you push the OS image file. The fastboot command is: "fastboot -w update <file name>." When you press enter, you'll see the progress of the file being unzipped and loaded to the device.
Again, once all is complete, reboot the bootloader with the command "flashboot reboot-bootloader".
Now that you're done, you'll be able get your device out of recovery mode from the device's screen and just boot up. This will get you back to the wonderful world of Android. You are pretty much back to stock at this point, but your bootloader is still unlocked. This is easy to fix. Just boot back into recovery, plug it to the Linux pc, then run the command "fastboot oem lock" then reboot.
My personality was helpful and dreadful at the same time with my curiosity of UbuntuTouch. I'm glad I was able to research and get this tablet I love back to life. For those of you interested in rooting, ROMing, hacking, etc I would not only use the toolkits the great hobbyist and developers put together, but take some time to understand what's going on behind the scenes. It just might be gratifying. It was for me anyway.